Sending new email campaigns with Siteglide

Did you know that on Siteglide you can send out any existing WebApp content in just a few clicks? - no more re-writing and re-formatting content every time you want to get in touch with your customers.
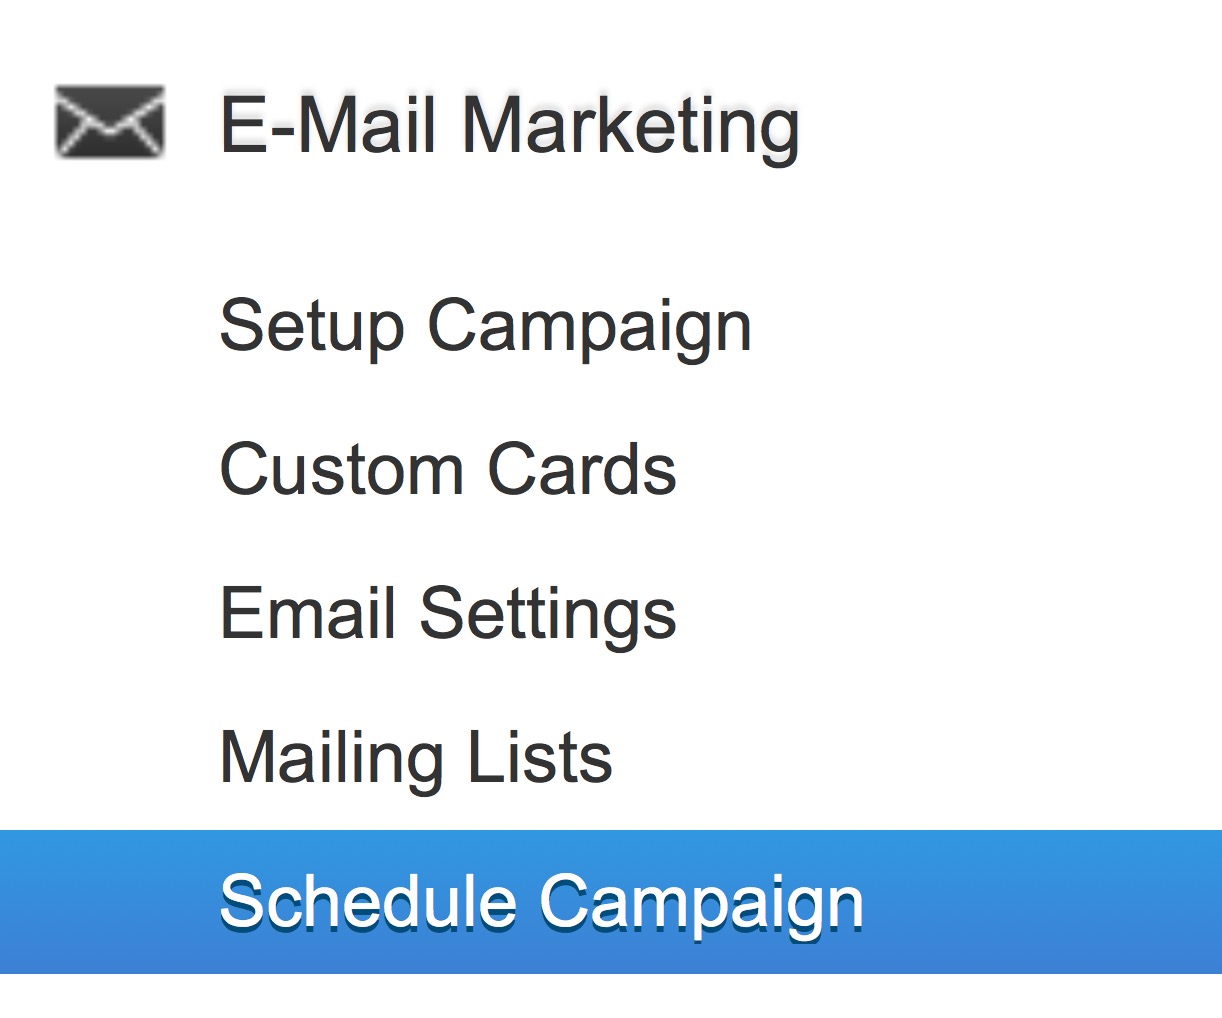
You’ll want to send out an email campaign when you get some fantastic stuff to share with your customers! To do this, you need to log in to your website to access your Siteglide portal, then head over to the Schedule Campaigns WebApp.
The Schedule Campaigns WebApp can be found on the left-hand side via “E-Mail Marketing” > “Schedule Campaigns”. Depending which version of Siteglide you're on, these may be named "Marketing" > "E-Mail Campaigns".
If you can't see this, then you probably don't have the email marketing service setup on your account- but if you would like to, come and ask us about the benefits!
Step 1 - Creation
Time to create a new campaign; you can do this by clicking on “Add Email Campaign” above the existing campaigns table.
Next, fill out the name of the campaign, followed by ensuring the “Campaign Type” is set to "One-Off". There is a great looking image below to help demonstrate this.
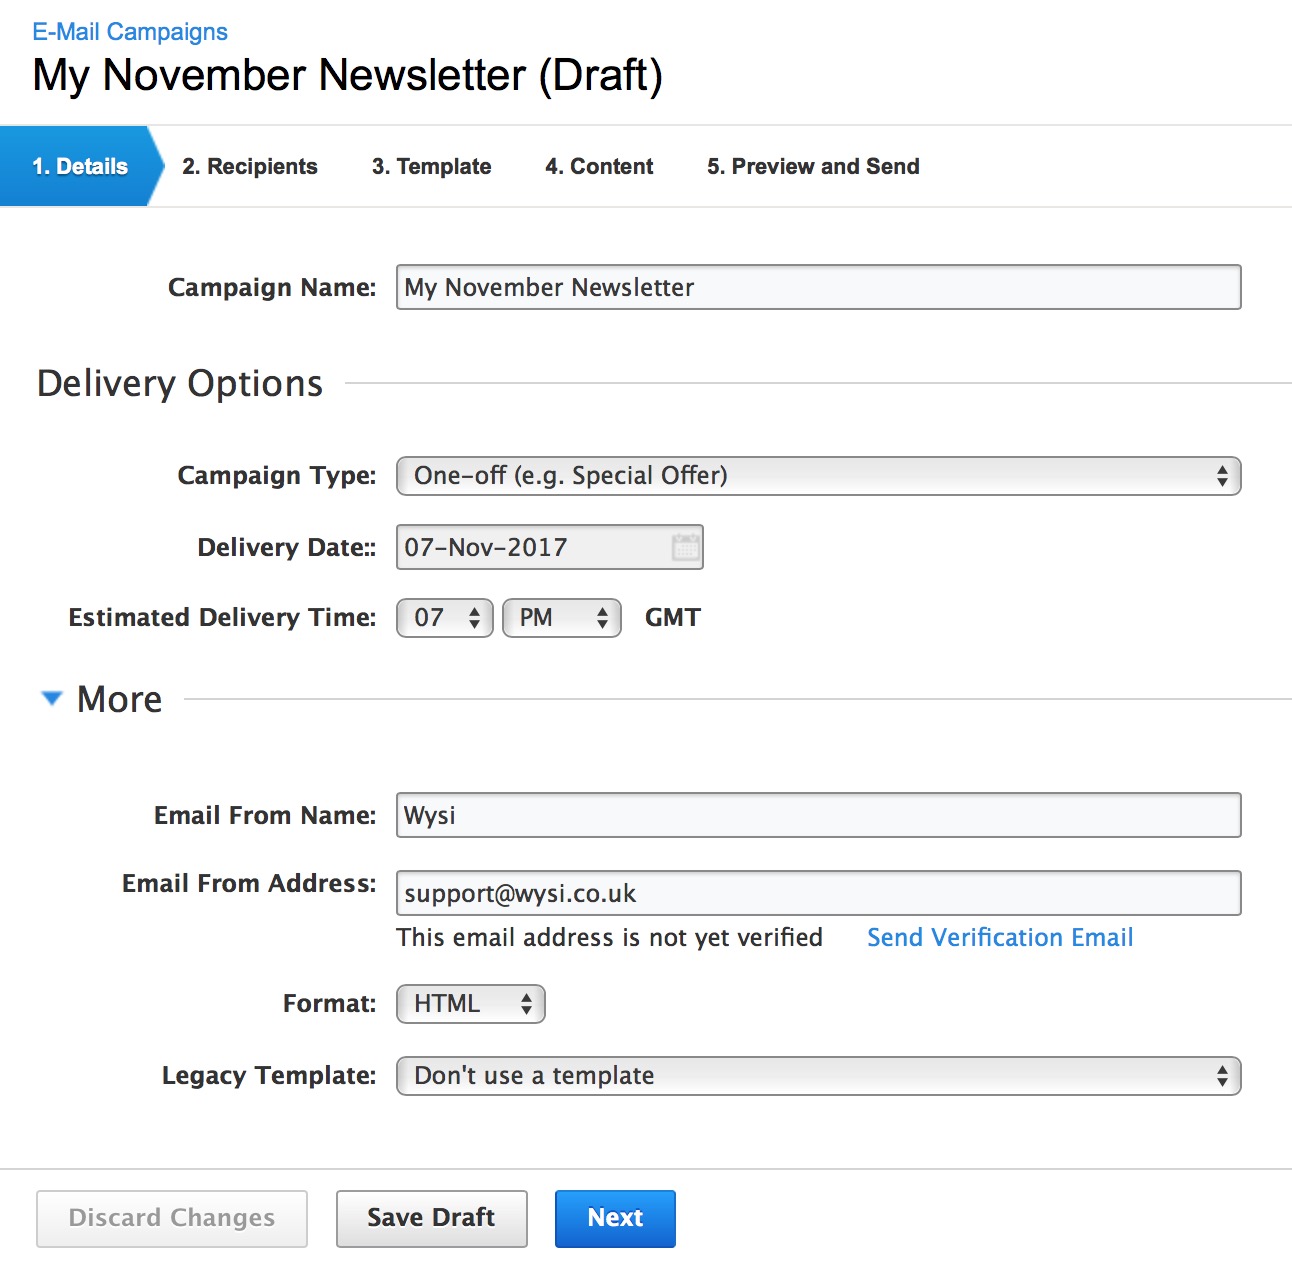
Top Tip: Clicking on the "^ More" button allows you to set the details of who the email is from. Please don't touch the "Format" or "Legacy Template" fields; it upsets the email-sending minions.
Next, click “Next”.
Step 2 - Mailing List
Select the recipient mail list you would like to use for this campaign; this will be the mailing list that the campaign email is sent out to. For information on importing emails to a mailing list, check out this guide.
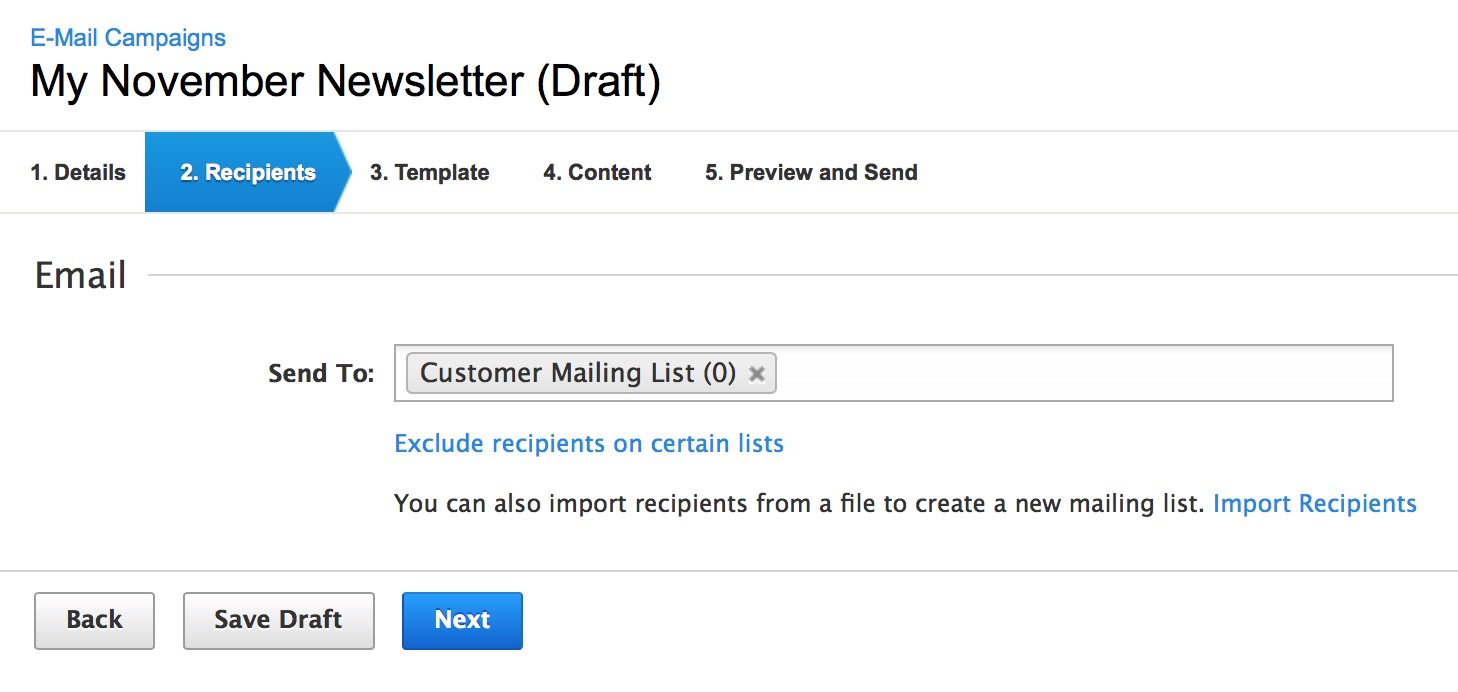
Once happy with your selection... yep, you guessed it- click "next".
Step 3 - Content
First, click "next" straight away, let's skip the "Template" part as we have set up some lovely bespoke ones for you already.
Now you are in the content step, you will see a text-editor-style page. On the right-hand side of this page, you’ll see a Toolbox area. In this right-hand side area, click on the "Modules" tab. Then “Web Apps”, followed by “List of Web App Items", this will display a little pop-up window.
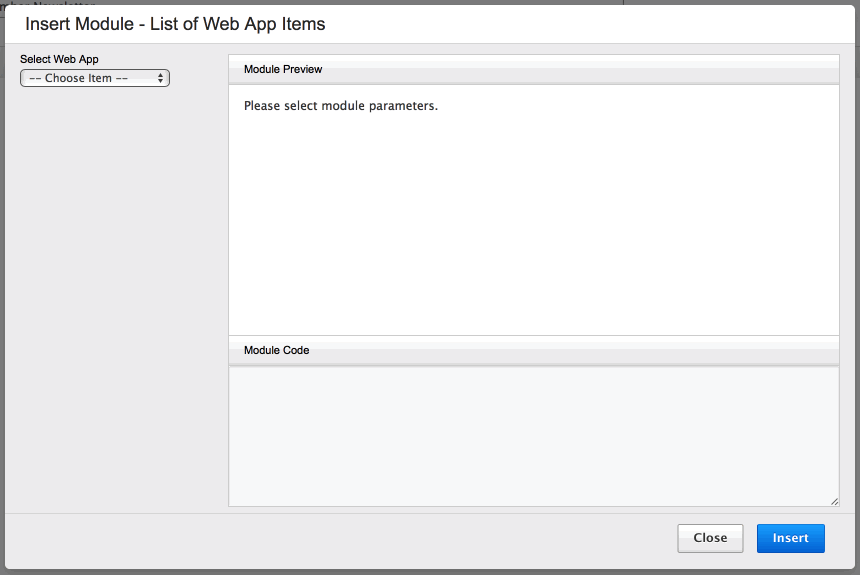
In here, on the left of the pop-up, you’ll see an option drop-down to select a WebApp, you’ll need to select the WebApp you have created your custom email in. On the next drop-down, select “Individual Item”. On the final drop-down, select the custom email you want to send out.
Finally, click the blue “Insert” button.
Step 4 - Sending
That’s it! You’re almost done.
Click next, review your email, and hit the "Send Test Email" button. We highly recommend doing this before launching the campaign- just to make sure everything is as you expect.
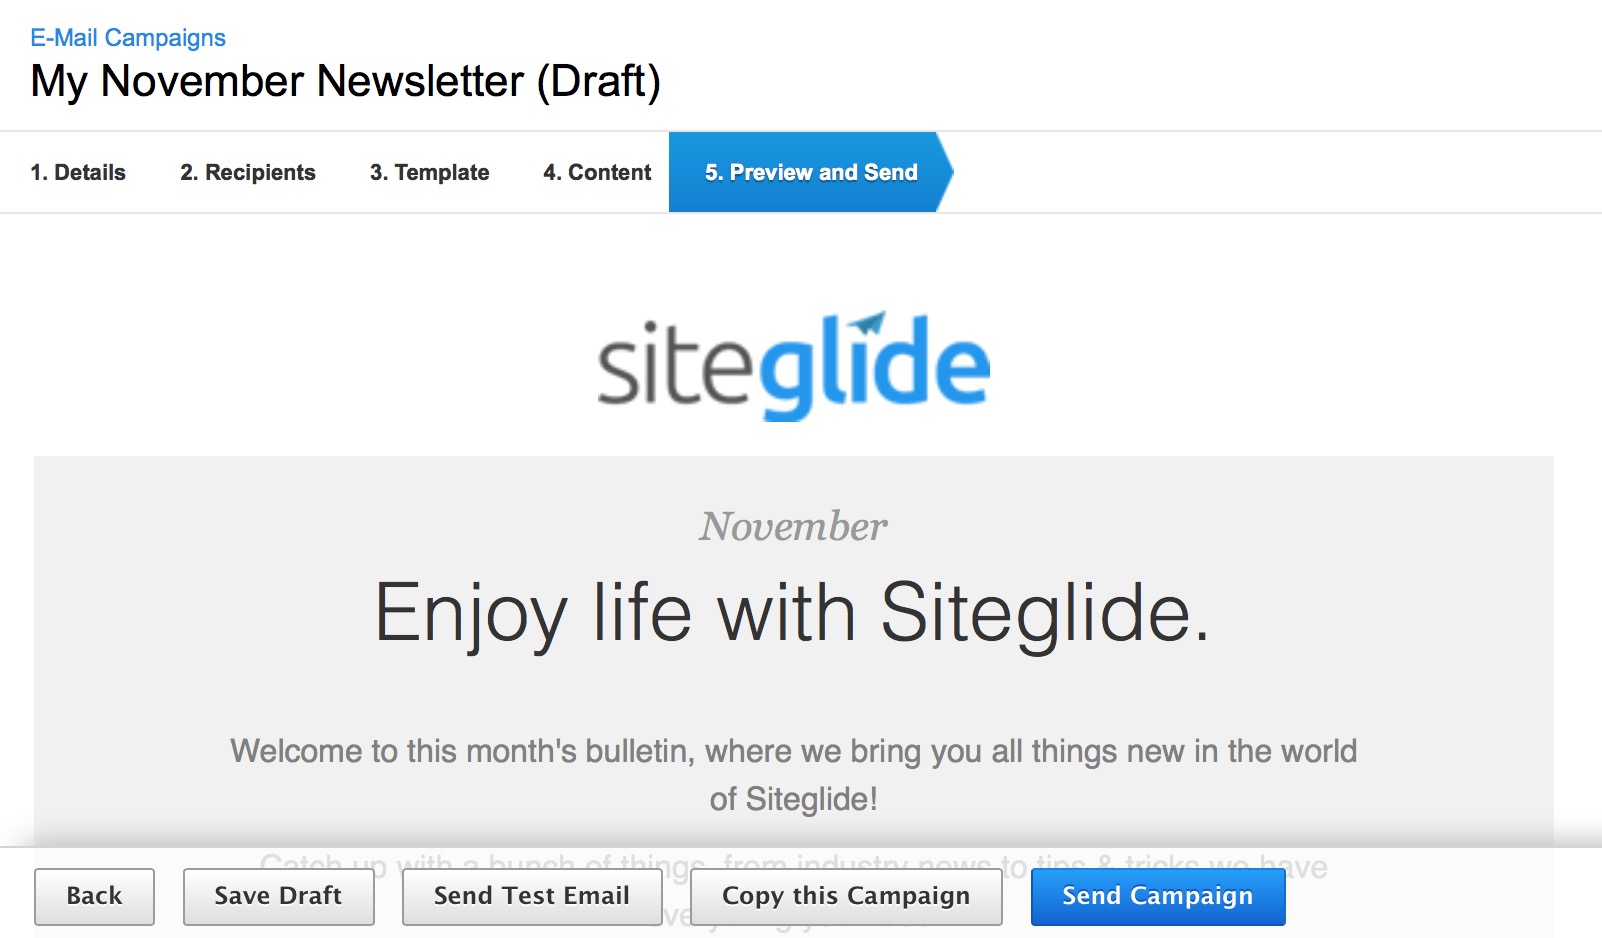
Once, you’re ready, hit “Send Campaign”. The campaign will then display a play symbol while its sending and finally a square symbol when it's complete.
Happy Campaigning!
If you would like to add the email marketing service to your account, then get in touch with us.
Martin Sanderson